
Hi, I’m Amber, and I’m cooking the alphabet with my two toddlers, and last week was a rough week and this week was only slightly better.

Today we’re making Honeydew Sorbet for H is for Honeydew.
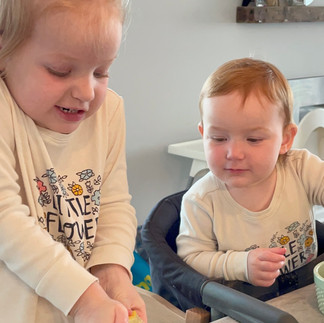
We actually had to split this one into two days because we had to freeze the honeydew. So the first day, I had my toddlers help me cut the honeydew into chunks. In reality, I really just let them play with it and I cut half of the honeydew myself because it was kind of sticky mess. My 3-year-old was a bit groggy from her nap, but my one-year-old loved it.
What you need:
Ingredients:
1 Honeydew Melon
1 Tablespoon Lemon Juice
2 Teaspoons Maple Syrup
Tools: Kid-safe knife, VERY HIGH POWERED BLENDER

Getting The Kids Cooking:
Set-up tasks your toddler can help with include:
Getting out the cutting board and kid-safe knife
Washing off the honeydew
Then the fun part comes:
Preslice the honeydew into chunks and let your little one chop them up
Put the honeydew chunks on a baking sheet and freeze
Squeeze one lemon into separate dish
Once honeydew is frozen, let your kiddo drop the chunks into a blender and add lemon and maple syrup, help blend until smooth (good luck!)
Pour puree into a dish and freeze for about 30 minutes until set, but not frozen solid
How it REALLY went for us: The next day, we attempted to juice a lemon, which was pretty cute. The girls then put the honeydew into the blender and we added some maple syrup and the lemon juice. Then we tried blending. Like we really tried...and tried...and added water and tried again...then moved it into a food processor and kept trying...it never really got to a good consistency, but we refroze it anyway. It did end up tasting pretty good, but you really gotta work for this one!
Remember to take photos of your little chef chopping and blending!


Now that the kids had fun, it's mama's turn!
Let's assemble the H page in our Baby Eats The Alphabet Recipe Book!
What you need:
Of course, we recommend purchasing a Baby Eats The Alphabet kit, which will have everything you need to create your recipe book keepsake (except the photos of your little ones), but honestly, the point is to create a beautiful book of your memories - which you can with: printed photos, paper (we recommend paper at least 8.5" x 8.5" so you can fit a photo plus the recipe!), double-sided tape, any fun embellishments you want like stickers, washi tape, or photo protectors, and something to hold your pages, like binder or scrapbook!
Write your recipe:
Use a small piece of paper to write down the recipe you used, and any memorable notes you want to record. Example - Okay, we TRIED so hard to blend this, and it would not blend!

Pick your photos and lay everything out:
Before applying any tape, I recommend you lay out all of your elements to make sure everything fits and you like how it looks. Once you're happy with it, tape everything down, starting with the bottom layer first! And here's how mine turned out:


I would love to see what you decided to cook and create for H is for Honeydew! Please tag me in your creations @BabyEatsTheAlphabet!
Comentários